Hugin is the result of an open source project that already has several years of history, and a serious maturity, it is available for free on its website. Although the ergonomics are not as successful as commercial solutions, this software has many features that, once the learning phase is over, will allow you to create all kinds of images, from the simple recovery of perspective, passing by assembling panoramic images to spherical images and mini-planets.
Thus, Hugin can handle the most diverse cases, from the simple assembly of some well-calibrated images, to complex assemblies. To answer these different situations, Hugin’s interface comes in three versions:
- Automatic Assembly Wizard → Simple Interface
- Access to main settings and functions → Advanced interface
- Access to all settings and functions → Expert interface
The two interfaces Advanced and Expert are very close, it is essentially the completeness of the information presented that makes the difference.
ASSISTANT ASSEMBLY AUTOMATIC (simple interface)
The wizard is the simplest mode of use, in the optimal case, one limits oneself to loading the images (step 1), then to carry out the alignment of the images (step 2) to finish by the assembly (step 3). The optimal case is encountered when the images have been captured while respecting the horizon, the images overlap by approximately 30% and they contain many details. In this case, the result of the automatic assembly is quite satisfactory.
For more complicated cases, it will be necessary to go through a manual process flow with the Advanced or Expert interfaces.
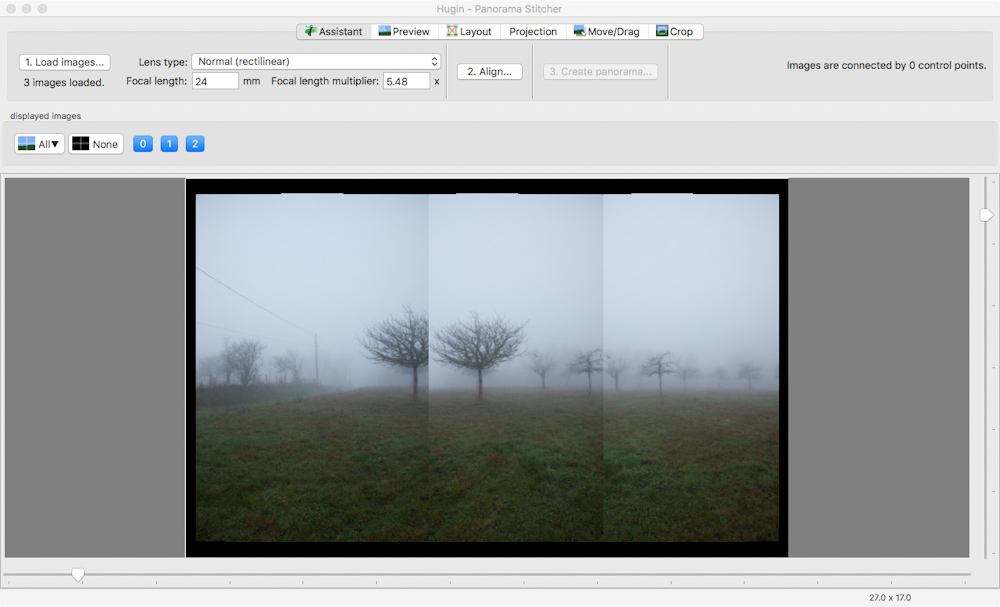
Assistant before alignment:
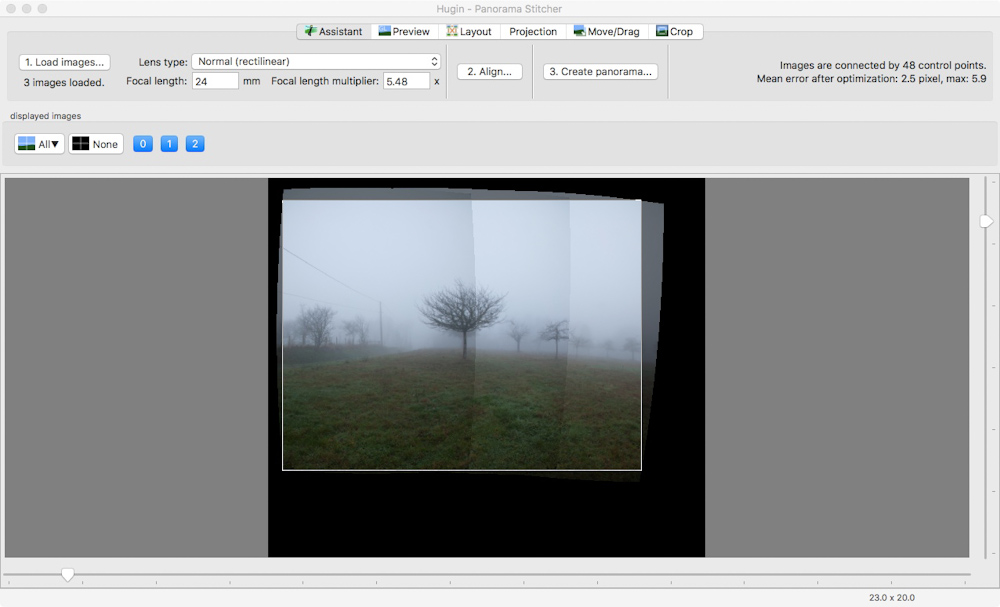
Assistant after alignment:
The other tabs of the wizard give access to some functions of positioning, cropping and projection of the panorama.
TIPS: In my process, I always start with an assembly automatically because it gives a good basis of work. If the result is not satisfactory, I switch to the Advanced interface on the same project. In addition, it makes it possible to measure the difficulty of assembling the image. For the usual cases, it is quite simple, however there are also cases, for example for the very uniform images and with little details, where the assembly is more delicate and requires more effort and a little patience .
MANUAL ASSISTANT (Advanced and Expert interfaces)
The manual process flow controls all steps and parameters. The added complexity that results, allows you to master all the steps and manage all the situations of your panoramic images.
“Photos” tab
To begin, we must load all the images of his project with the function “Add images”. The choice of information to display is in the right part.
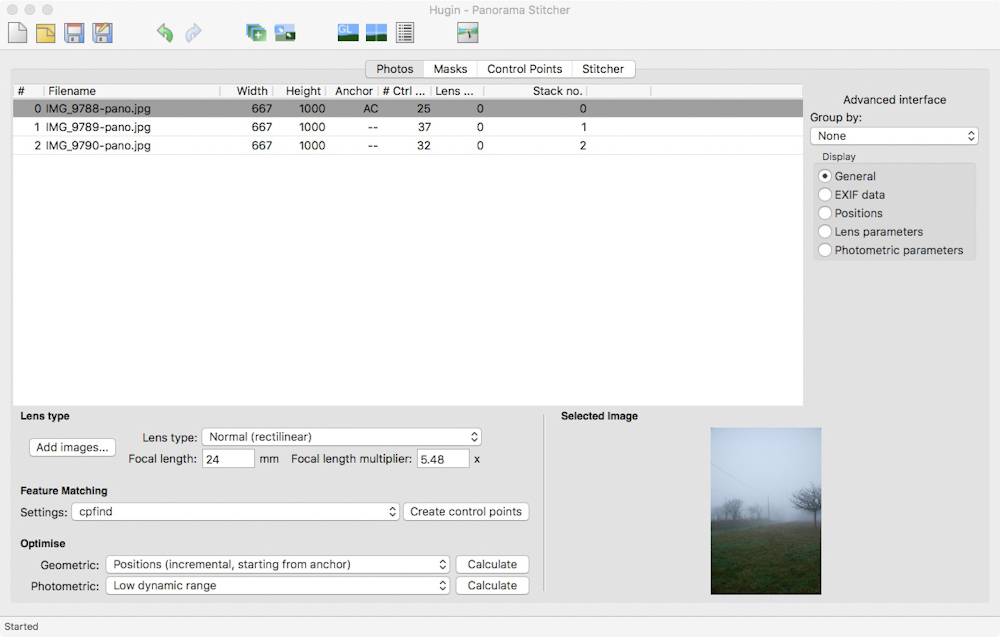
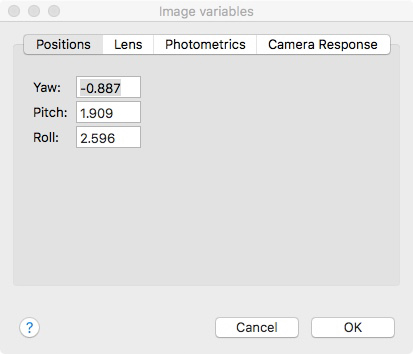
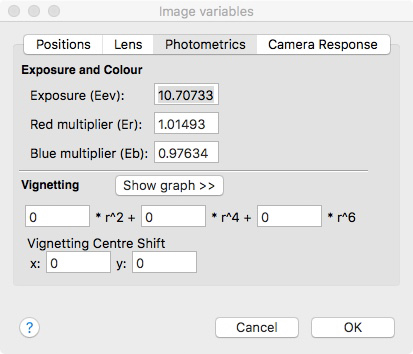
For one or more images, one can access a whole set of parameters relating to the position, the objective, the photometry and the response curve of the camera. You can view the settings and also edit them.
To be able to assemble and merge the images together, the software will rely on points of correspondence that we call control point. They correspond to points of the photographic scene that appear in several images. Their specification can be done automatically or manually.
Hugin has a very powerful algorithm that automatically looks for these control points, the results are often very good, or even quite impressive. The function “Create control points” performs this automatic search of control points. Of course, they can be modified manually or enriched later.
With the control points, the images are now linked together. The reference image is used to indicate the absolute position of the panorama and the average exposure. For this, choose the most representative image for the position, in fact the most horizontal image, and also choose the image with the desired exposure.
The “Optimization” section is used to activate the functions for optimizing the geometry and photometry of the images.
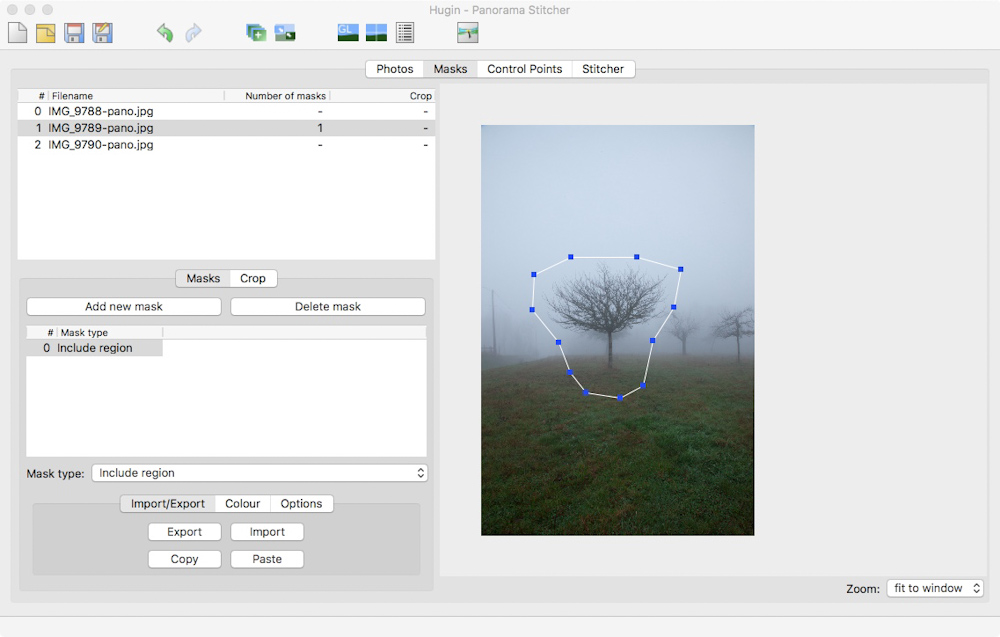
“Masks” tab
Hugin manages the notion of Mask that defines an area of an image that must be included or excluded from the panoramic image. This is particularly interesting, for example, for the case of a subject that straddles two images. By specifying an inclusion zone around the subject, the software is forced to keep the subject integrally without transition.
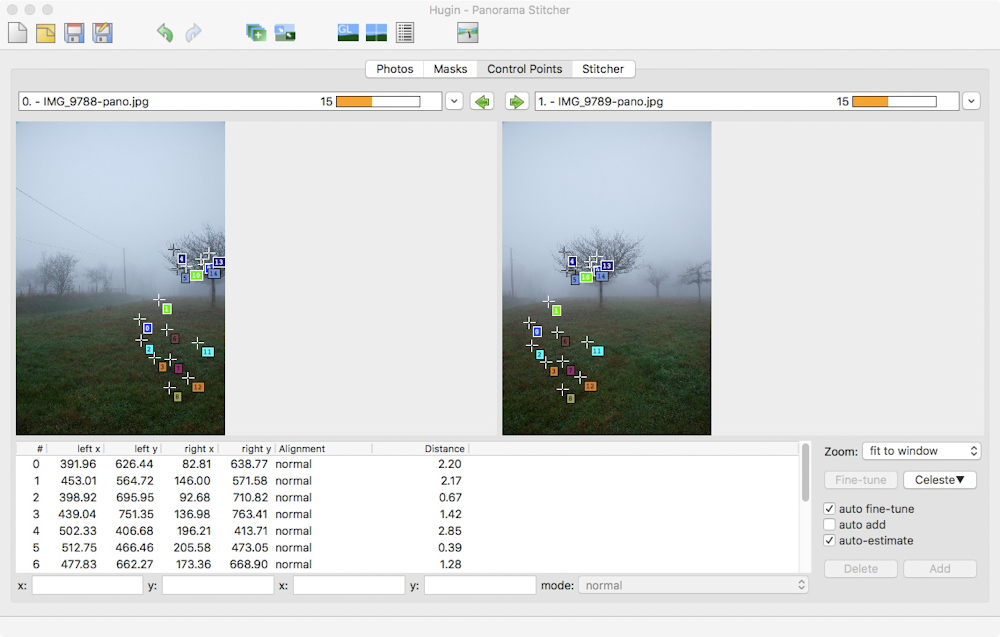
“Control Points” tab
Hugin displays here the control points between two selected images. You can also change the position of points already present, or manually create new points. This is a particularly important step in the process, which is decisive for the quality of the final result.
Hugin also allows to specify horizontal and vertical lines, which is effective to build panoramic images whose horizon is respected.
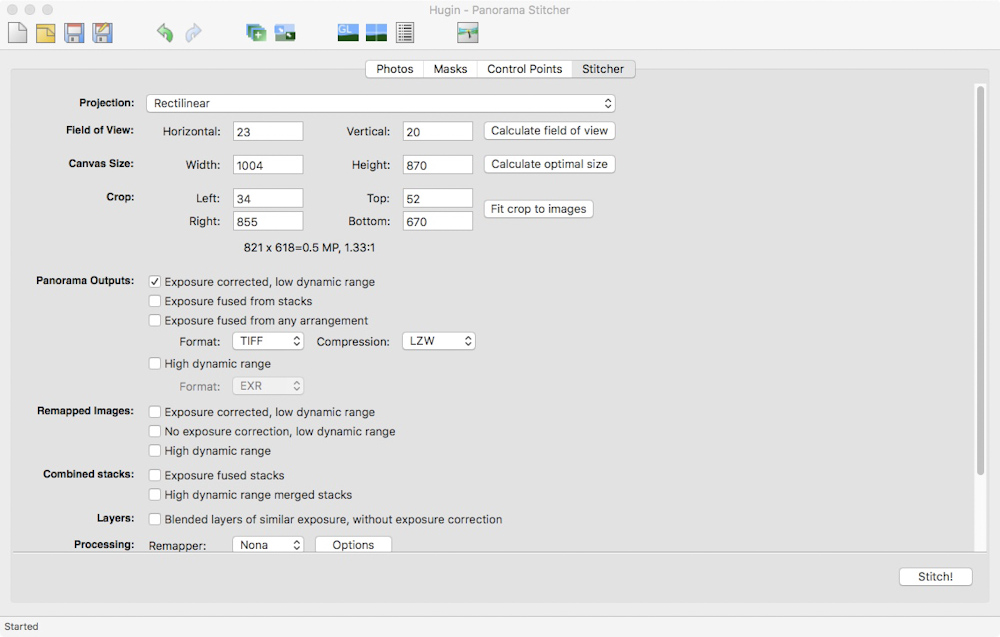
“Stitcher” tab
All parameters that define the final image are searchable and editable in this tab. We find in particular the projection, the angle of field, the dimensions in pixels of the panorama and the output format. The other parameters (reformatted images, …) are of less common use.
CONCLUSION
We have now covered the main functions and screens of Hugin. Several possibilities have not been mentioned here, most of them are for advanced use. You will be able to discover them as soon as the initial learning is done. Although the GUI may seem a little austere, I hope you will be seduced like me by the many possibilities of this software. I use it very regularly and am very satisfied with the results. You can find a concrete example of how to assemble my Hugin article: Creating a panoramic
Previous page | Table of content | Next page
This page does not claim to be an exhaustive description of all features of the latest version of Hugin. It aims to provide the reader with a general understanding of the possibilities and functioning of Hugin (version 2019). For the latest version, refer to the website Hugin.