IMAGE PREPARATION & CORRECTION
After shooting, the photos are transferred to a computer. The first step is to correct the imperfections of the photos.
In the case of the Gopro, the main characteristic to correct is chromatic aberration, which, given the field angle of the camera, is a relatively present phenomenon.
Once the correction settings are determined, they must be applied to all the photos in the sequence. All corrected photos are then grouped in a dedicated directory which will facilitate the next steps.
It is also at this stage that we can erase the parts of the support (tripod, panoramic head) that are visible in the images.
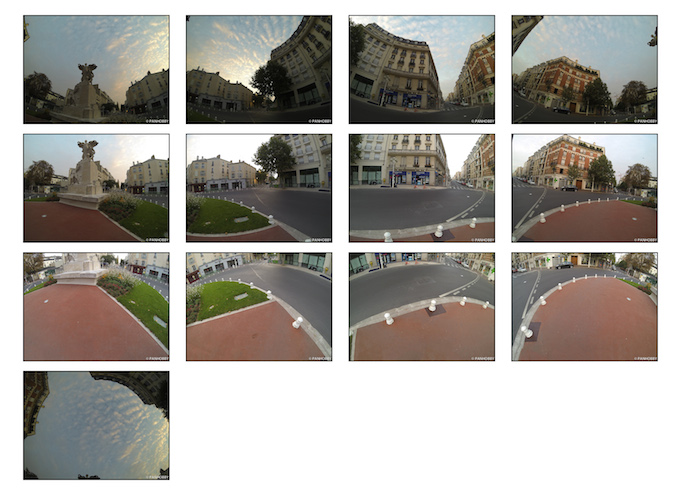
The nadir is the point of the celestial sphere representative of the descending vertical direction, so it corresponds to the point below the position of the camera. The shooting is done with a tripod, the latter appears in one or more images of the bottom.
Indeed, for the views oriented towards the ground, the position in the vertical of the apparatus is occupied by the support, whereas it will be in the center of the mini-planet. It is therefore important to erase the traces of this medium, it can be done at this stage as indicated, or in the final phase once the image is assembled.
The erasure of these elements is done with a tool of the type “Duplication buffer” such as those available with the main image processing tools.
CONSTRUCTION OF THE ASSEMBLED IMAGE
All images are to be loaded into the assembly software. The characteristics of the images, in particular the focal length, must be specified.
Reconciling the images between them requires specifying the points of correspondence, also called control points. These points are created automatically by activating the automatic search function of these points (usually SIFT algorithm or derivative).
To ensure proper image alignment, I recommend reviewing each pair of adjacent images to confirm that control points are present. If necessary, points may be added or corrected manually.
The reference image for the position must be chosen from the photos of the central row. For the reference image for the exhibition, choose the most representative image of all the images.
Then, start optimizing the image positioning parameters. This operation is usually to run several times until an acceptable alignment of all the images is achieved.
Given the extremely wide angle of view, many variations in brightness are most likely present, to mitigate this, launch the photometric optimization.
Finally, choose the equirectangular projection system and the field angles (360 x 180) and create the assembled image.
