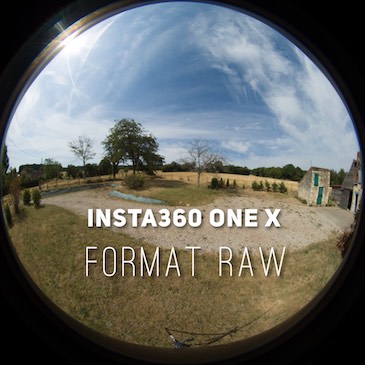
Similar to traditional cameras (especially SLR cameras), some 360 cameras can also capture RAW images. I’m looking at this format for Insta360 ONE X cameras and how to use these files. In this article, I compare the detailed results obtained with 1) Assembly in the camera, 2) Automatic assembly with Hugin and 3) Assembling optimized manually with Hugin.
The RAW format makes it possible to keep the maximum amount of information of the image in a set of raw data. In any case, this format requires more post-processing, which is even more true for 360 devices, where image transformation and fusion are additional steps.
In the case of Insta360 ONE X, RAW images are produced in a single DNG file that contains the image of each of the lenses. These being of fisheye type, the images take a circular shape that will have to be smoothed in order to be able to merge them with each other.
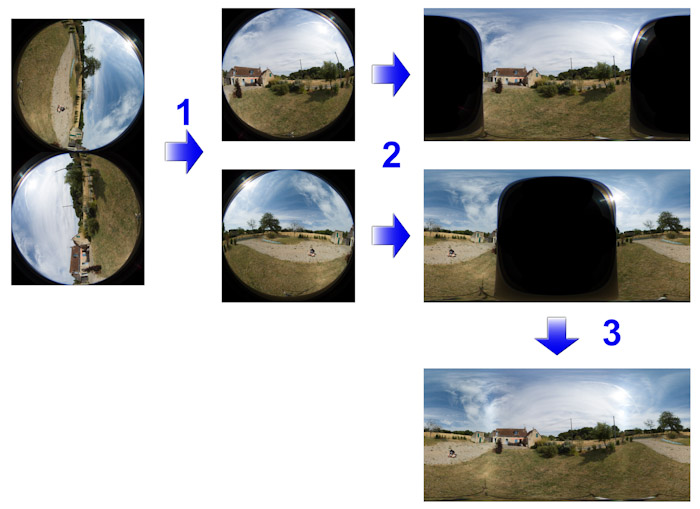
The main steps are:
- Step 1: Cut the single image with both lenses to have a lens image.
- Step 2: Reprojection of the image of each lens to simplify the fusion of the images.
- Step 3: Merge the images of each of the lenses
This complete process may seem a bit complicated, but I would remind you that, as standard, the Insta360 ONE X camera and all the 360 cameras on the market automate all the steps. Only for specific situations can it be desired to manage it manually. What is described later in this article should be considered advanced and unusual use.
As part of the manual process and the RAW format, the transformation and fusion must be done with software dedicated to panoramic photography. I use the free software Hugin, it is not the easiest to use, but it has the advantage of offering a lot of possibilities and flexibility.
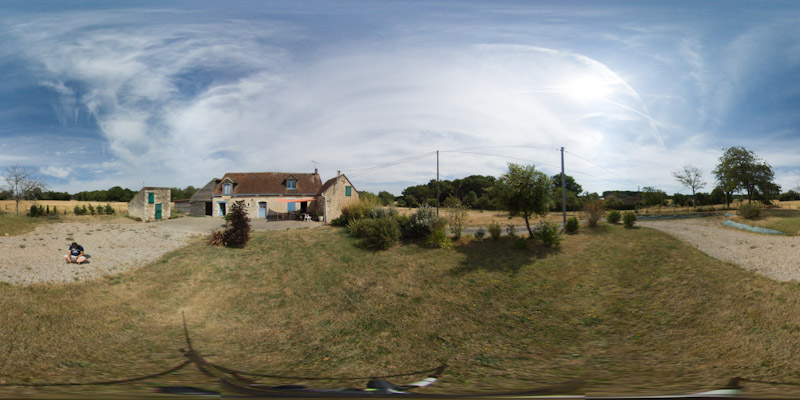
FUSION INSTA360
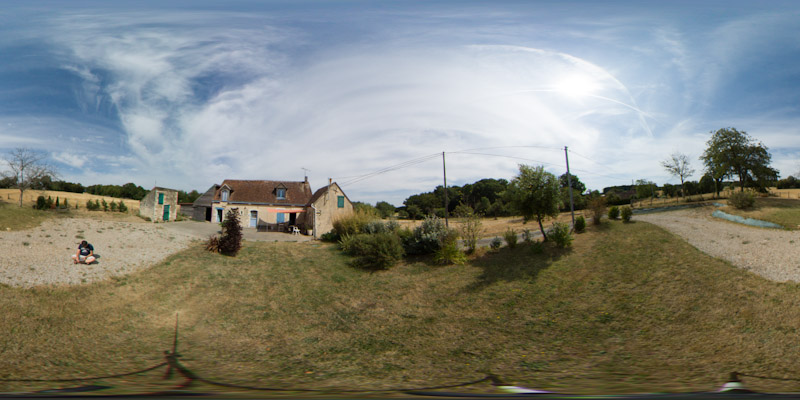
Reference image obtained automatically with the Insta360 application:
FUSION – AUTOMATIC HUGIN STITCHING
The images should be loaded into Hugin indicating that they were taken with a circular fisheye lens. By knowing the geometric structure of the shot, the software will know how to reproject the images to a more realistic projection system.
Note at this stage, according to the custom, we could be satisfied with a single lens, the Insta360 ONE X then being used as a single lens camera very wide field (about 180 °). After reprojection of the image, we obtain a panoramic image.
Then, the automatic search of the points makes it possible to determine the points of junctions between the two images. The automatic result is more or less satisfactory depending on the content of the images. The more details there are, the more the software will be able to find relevant features.
If the automatic search for points, there is of course always the possibility to add the points manually.
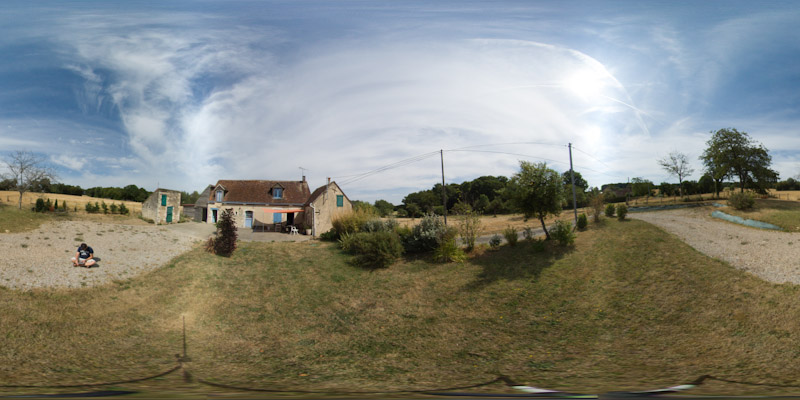
Finally, you can merge to have a single image that includes the information from both objectives. This result obtained through the automatic processing of the software already give a satisfactory result.
FUSION – HUGIN ASSEMBLY OPTIMIZED FOR HORIZON CORRECTION
The advantage of the Raw process is to open the possibility for experts to fine-tune the assembly and merge parameters. A case of concrete use is the correction of horizontality: by fixing control points to specify the best horizontal and vertical lines, the software will be able to adjust the parameters of the images and thus obtain – from the fusion – a horizon more close to reality.
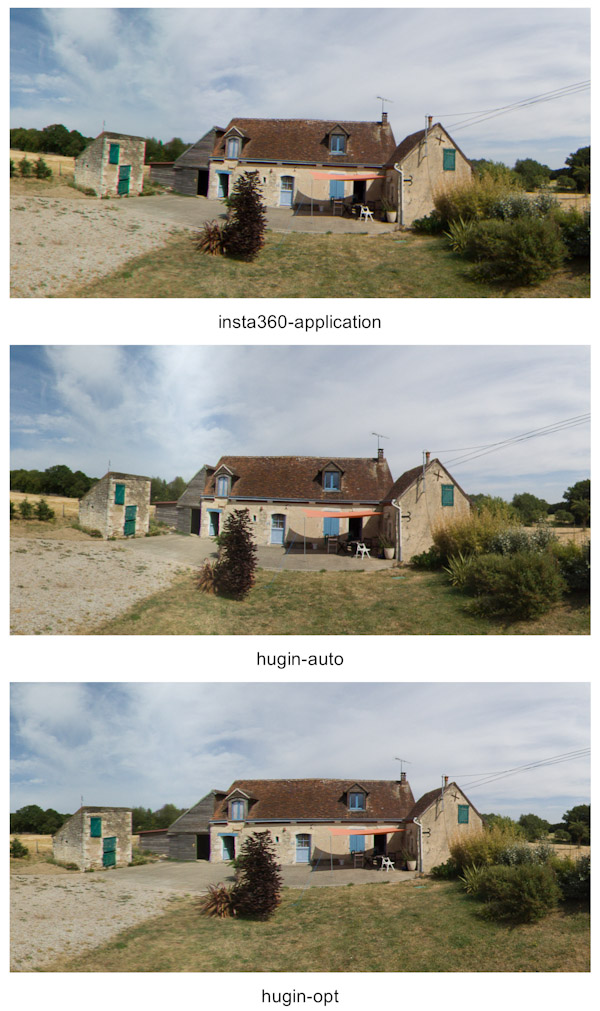
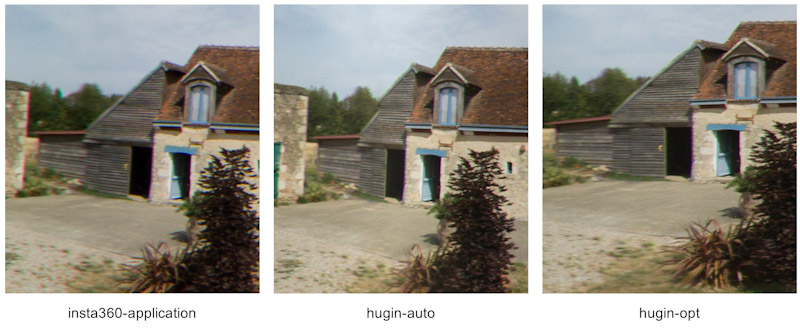
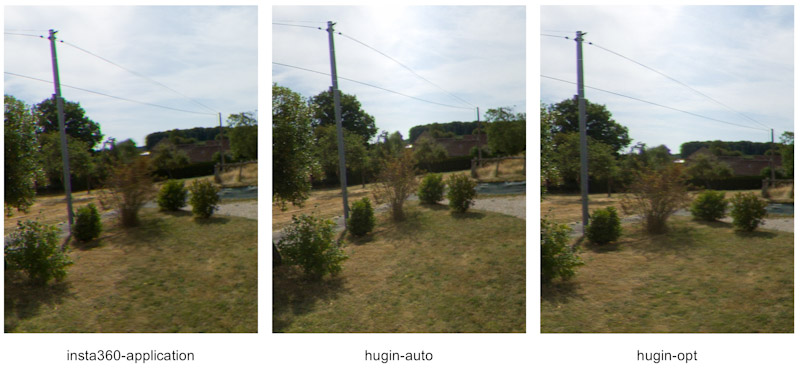
COMPARED RESULTS
In this section, I propose to compare details of merged images according to the two previously described techniques with the image automatically produced by the camera.
Close-up views of the house :
Detailed views of the garage :
Detailed views on shrubbery :
FORMAT WITHOUT LOSS
Another benefit of this process is to keep as much detail as possible. By using a lossless format (for example TIFF), it is ensured of the reduction of the compression losses which one has for example in JPG, and thus of the maintenance of the quality in the case of a process of treatment complex and multi-step image.
CONCLUSION
These different processes are to be compared with the complete generation of 360 images by the camera. Even if you lose control of the steps, for my part, I remember that the process is much simpler and that the passage through the RAW format and the progress of all subsequent steps will be justified only on rare occasions (for example: manual selection of the melting zones, maximum reduction of dynamics and compression losses).