HDR mode makes it possible to significantly extend the range of brightness captured for an image, and thus to manage very contrasting situations. With the Insta360 ONE X camera, the easiest use is to use the Insta360 Studio software. For more possibilities, we can use software richer in HDR functions such as Affinity Photo. Comparison of the results in this article.
The Insta360 ONE X camera manages an HDR mode for photographs and also for videos. The principle is to capture several images with different exposure settings. Thus each of the images focuses on capturing details in black, in midtones and in highlights.
Note that it is also possible to use manual mode and take several image captures with different exposures to increase the amount of information and details in the most extreme areas of brightness. This qualitative gain results in a less direct and more manual process.
However, it should be noted that the images obtained with the automatic HDR mode are already very interesting, and that it is sufficient in the vast majority of cases.
Then, the fusion of the images is the operation which will allow to gather in a single image, the maximum of information as much in the dark tones as the light tones. With the Insta360, the fusion is not done in the camera but in the Insta360 Studio of the computer.
As all the captured images are available on the computer, the fusion of images can be carried out with the software of your choice. I am testing here the merger with Affinity Photo software which has several functions and settings to manage HDR images, as well as free software Enfuse.
EXAMPLE OF A VERY CONTRAST IMAGE
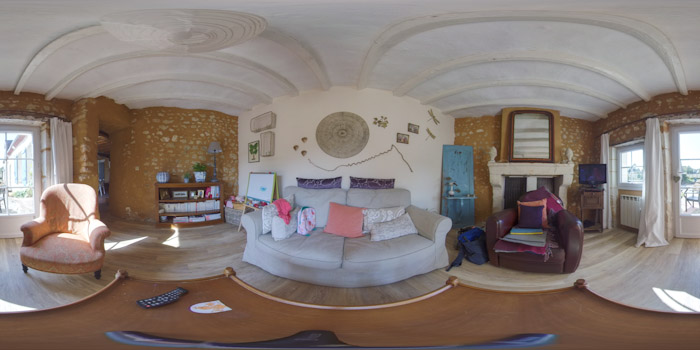
As an example, I captured images from the interior of a small living room of rather low general brightness and whose windows overlook the exterior which is completely sunny.
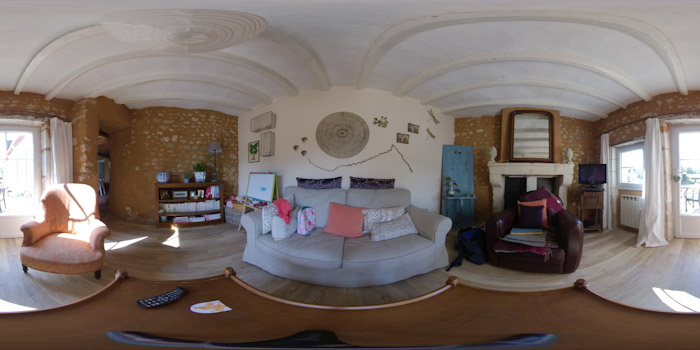
Medium exposure image (the exposure is adjusted for the whole image, the areas which would be very light or very dark, will be completely over-exposed or under-exposed):
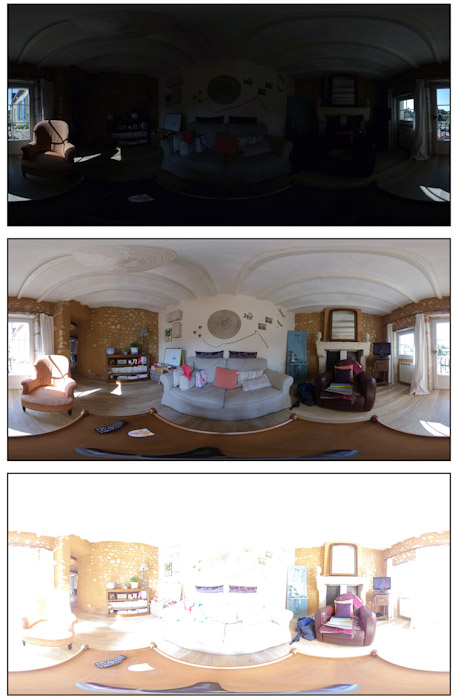
Three images captured with very different exposures:
FUSION WITH INSTA360 STUDIO
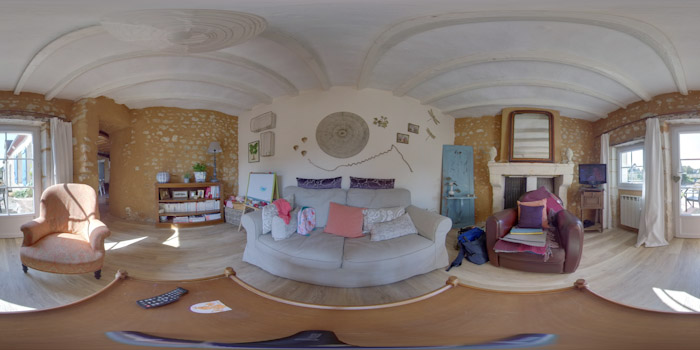
With Insta360 Studio, HDR merging takes place automatically as soon as the images are selected and without any settings to be specified. The result will be obtained quickly and effortlessly. It is rather flattering, however the absence of adjustment does not allow either to personalize or adapt the treatment to its images, or to treat the images with subtlety.
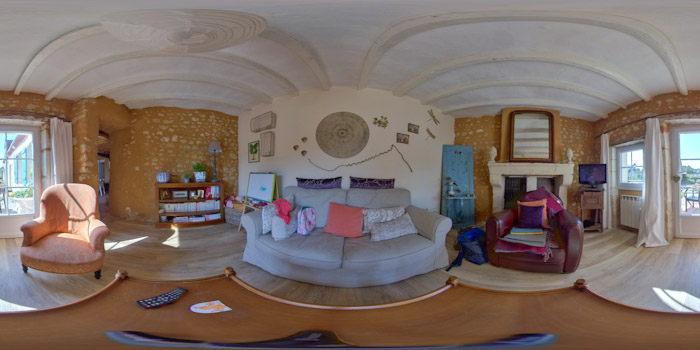
Example of fusion with Insta360 Studio:
FUSION WITH AFFINITY PHOTO
Affinity Photo is an extremely powerful photo processing software, it is positioned as an alternative solution to Adobe Photoshop, with the advantage of a commercial model of perpetual license and not of a subscription.
This software has an HDR function whose numerous settings allow everyone to personalize the treatments. The examples I present in this article are obtained with the default settings. It is possible to improve these results with a little experience and mastery of the many parameters.

Example of fusion with Affinity Photo:
FUSION WITH ENFUSE
Enfuse is free merge software available on the Internet. Originally, it was used on the command line, today there are several graphics applications, such as Imagefuser or EnfuseGUI, which simplify its use by giving access to all the possibilities without requiring to enter a command line.
Example of merger with Enfuse:
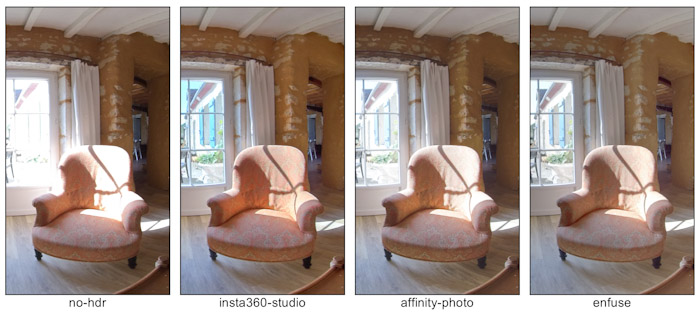
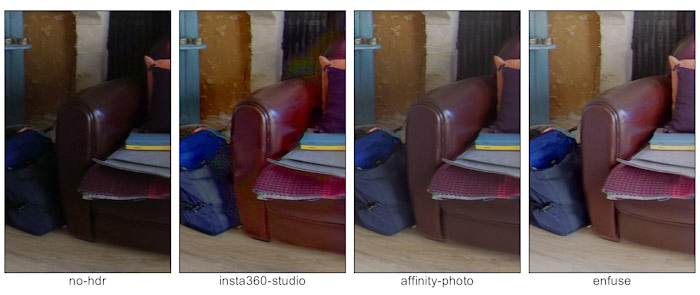
COMPARED RESULTS
Example 1: Interior and window with sunny exterior
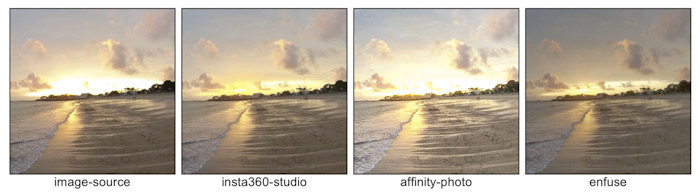
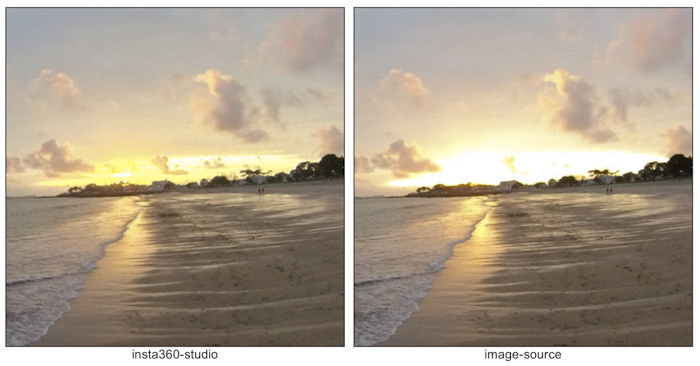
Example 2: Sunset
CONCLUSIONS
The results with the Insta360 Studio are generally very satisfactory, however, as demonstrated in this article, artifacts may appear in certain areas of the images. However, to obtain better subtlety of tones, we will turn to specialized HDR fusion software. I find that the results obtained with Enfuse are well balanced and by default, quite subtle.
For a quick result, I recommend Insta360 Studio, and for a better managed and slightly less direct result, the Enfuse software seems completely appropriate to me.
One Response
Richard
Interesting article
I use the pro 2 but can’t get the darkest exposure to see the outside using 7 images in hdr. Still comes in over exposed.